Back to Cattail's Origami Page.
Go to Rose Help Page.
Go to Step 8.
This page covers steps 10 - 12, and shows you how to "see" them. Folding the rose is best accomplished by what I'm going to call "faith folding" - looking at only the current place you are folding, and allowing the rest of the paper to take care of itself, even if it unfolds itself.
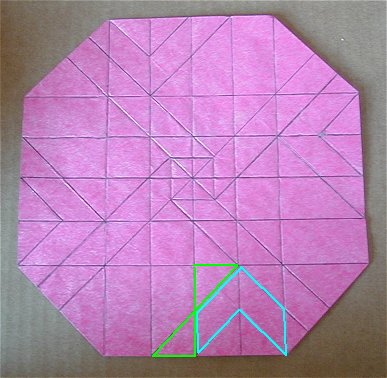
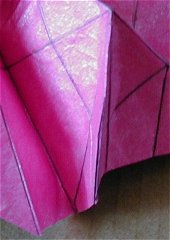
What it looks like before step 8 from the front. Be sure you can find the "hourglass" and the "chevron" on all 4 sides for later.
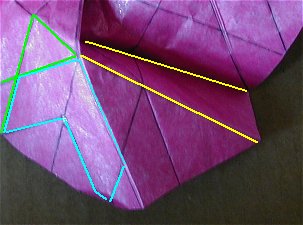
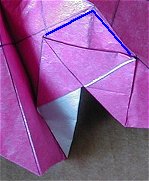
Here are the things to look at for step 10. The yellow line is the fold, and it extends up underneath the z'd flap.
Better seen from the underside, this fold does not actually fold all the way flat until step 12. At this step,
all it does is mountain the model in the correct direction and allow you to open the layers over the center square.

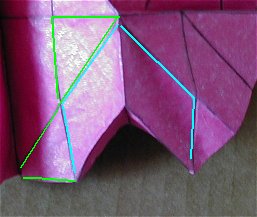
Remember to fold on faith, that is one crease at a time, letting the rest be. As seen in the above picture, it
does not have to fold completly, just enough to open the top.
I think step 11 should have been 2 steps. The first being the z and the second being the flattening of the chevron.
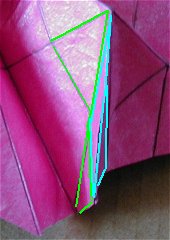
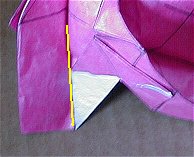
Step 11a. The z.
Here's the view. In the book, the mountain fold only goes to the first crease juncture. As far as I can tell, this
is a diagram problem. The fold extends all the way to the top of the chevron.
The fold at the top right edge of the chevron comes unfolded. Don't be concerned. It's supposed to.
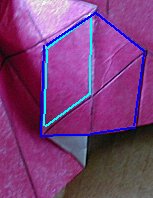
Step 11b. The chevron.
The bottom triangle under the chevron goes in.
And you flatten the chevron in half. It doesn't actually get this flat until step 12, where you are supposed to
tuck it to the left, but tissue-covered foil lets you do things and it stays where you put it. So here it is flattened.
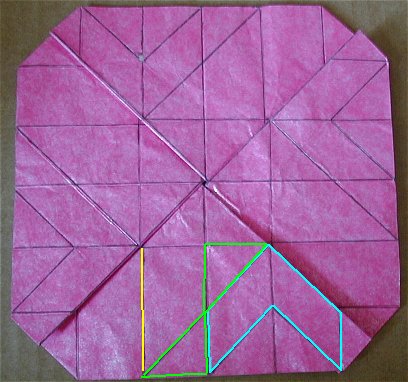
Same picture with colors for where our hourglass and chevron went.
Another step that could have been two. By now, you can find the hourglass and the chevron in step 12 in the
book's picture. First, fold the diagonal through the hourglass. No new folds yet! This presses what's left of the
chevron to the left.
Then, locate the house.
The valley fold upwards adds a new crease across the house.
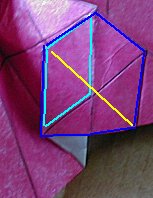
Like so.
Here's another view of it. The yellow line is where the model closes together.
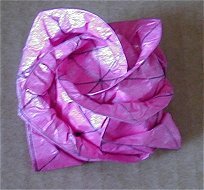
The rest you should be able to figure out from the diagrams in the book. The next picture proves you should not
fold really tired, after using smudgy pencil to mark the creases. And for those of you who noticed my 2 extra creases
(pencilled too none-the-less), rest assured, I saw them too.
Go to Step 8.
Go to Rose Help Page.
See more pictures and other things of interest, including a dime-sized rose, back on Cattail's
Origami Page.